Set the default Font and Text Color for Microsoft Outlook so that you don’t have to format everything every time you send, reply, or forward an email. It will already be set as the default. It’s like decorating a handwritten letter, making it look nice and easy to read, which leaves a positive impression on the reader. This is part of the Outlook user guide series, so make sure to follow along for more articles on using Outlook.
Most people tend to overlook these basic things. But if you want to make job applications easier and work in a professional environment, you should pay attention to the smallest details. Many companies also emphasize and have guidelines requiring employees to follow a common pattern or template.
In this article, Bien Thuy will guide you on How to Change the Default Font, Color, Style, and Size for Emails in various versions of Microsoft Outlook, including Outlook 2010, Outlook 2013, Outlook 2016, 2019, and Office 365.
To set the default font and font color in Outlook, follow these steps:
- Open Outlook.
- Click on the “File” tab in the top left corner of the window.
- Select “Options” from the drop-down menu.
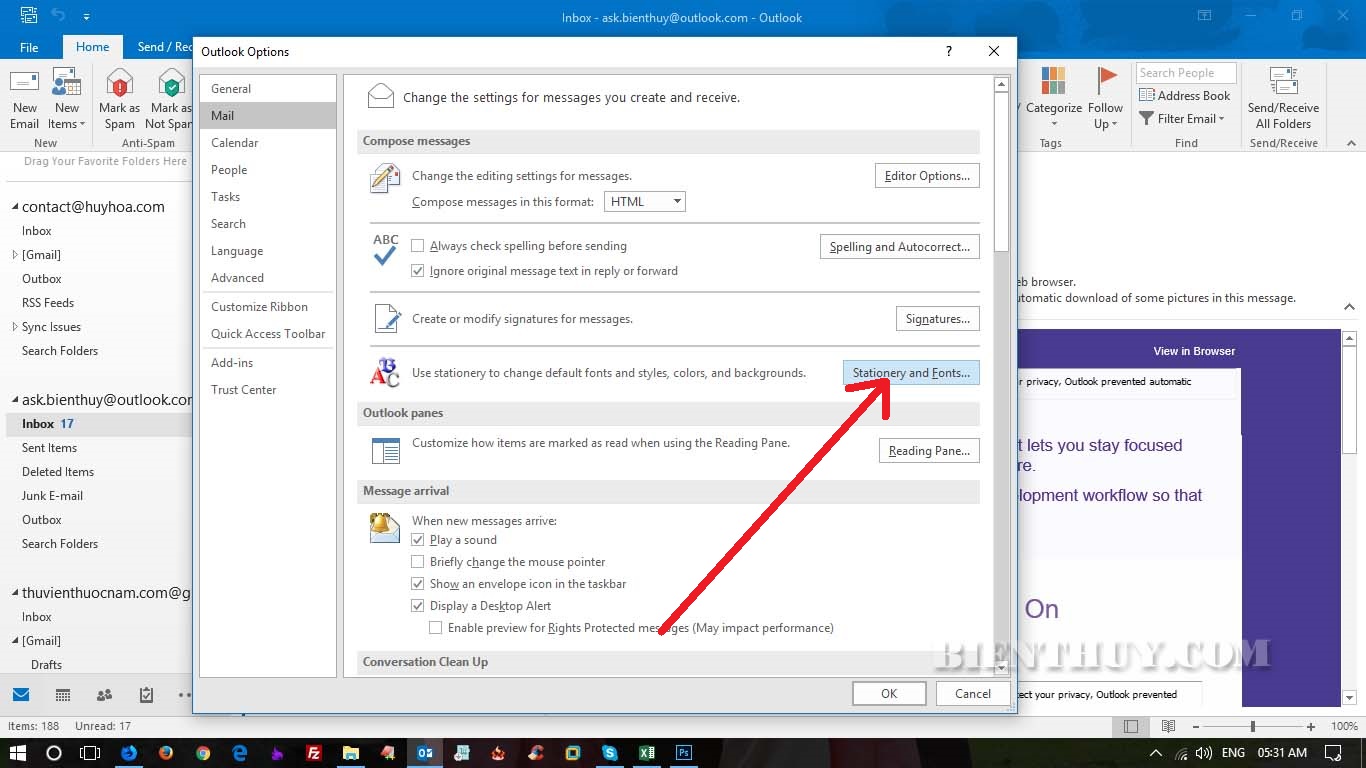
- In the Outlook Options window, click on the “Mail” tab on the left sidebar.
- Under the “Compose messages” section, click on the “Stationery and Fonts” button.
- In the “Stationery and Fonts” window, click on the “Font…” button under the “New mail messages” section.
- Choose the desired font, font style, size, and color from the available options.
- Click “OK” to save the changes.
- Click “OK” again to close the Outlook Options window.
Outlook User Guide: Setting Default Font
First, open Outlook and click on File
Figure 1: How to set default font and text color in Outlook
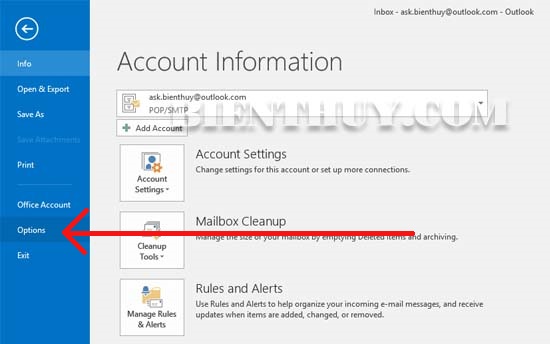
Next, go to Options.
Then, the Outlook Options dialog box will appear. On the left column, select Mail (right below General).
Then, on the right pane, select Stationery and Fonts.
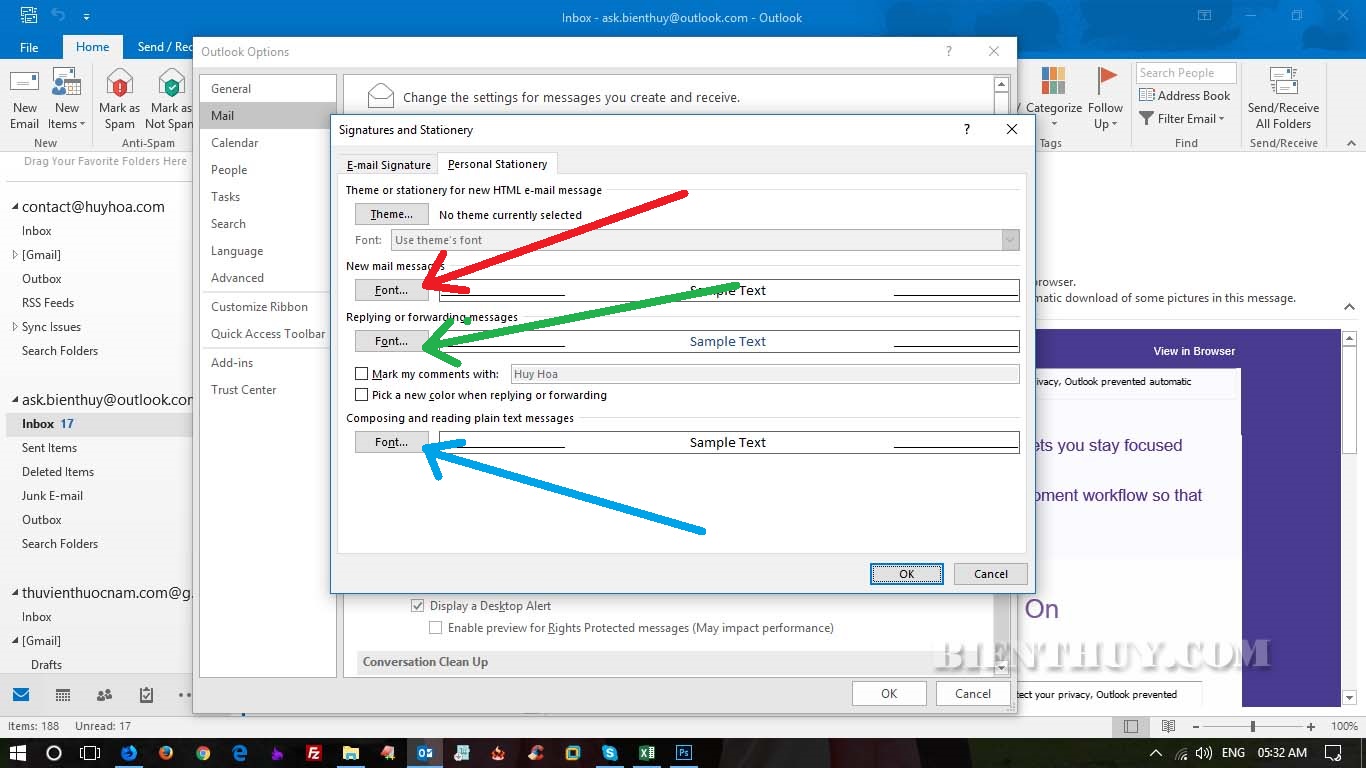
A Signatures and Stationery dialog box will appear, and you will see three custom Fonts options for different types:
Click on the configuration options for composing new mail, replying, or forwarding emails.
The “New mail message” is for composing a new email.
Replying or Forwarding messages is for replying to or forwarding emails to others.
Composing or Reading plain text messages; is for reading or composing emails in plain text mode, without HTML formatting.
Outlook User Guide
Biên Thùy only provides instructions for the New mail messages section. You can follow the same steps for other sections. Click on the corresponding Font button, as indicated by the red arrow in Figure 4.
Adjust the font for New mail messages in the Font dialog box.
Mục Font (red arrow in Figure 5). Please select the font, and it is recommended to choose Arial. If you want some beautiful fonts, you can read and download beautiful handwritten fonts to decorate your email.
Mục Font style (blue arrow in Figure 5). Choose the font style – Regular for normal, Italic for italics, Bold for bold, and Bold Italic for bold and italics combined.
Mục Font size (sky blue arrow in Figure 5). Choose the font size, and it is recommended to select font size 10 or 11.
Mục Effects (purple arrow in Figure 5). Choose the effects, and it is recommended to deselect all the checkboxes in this section.
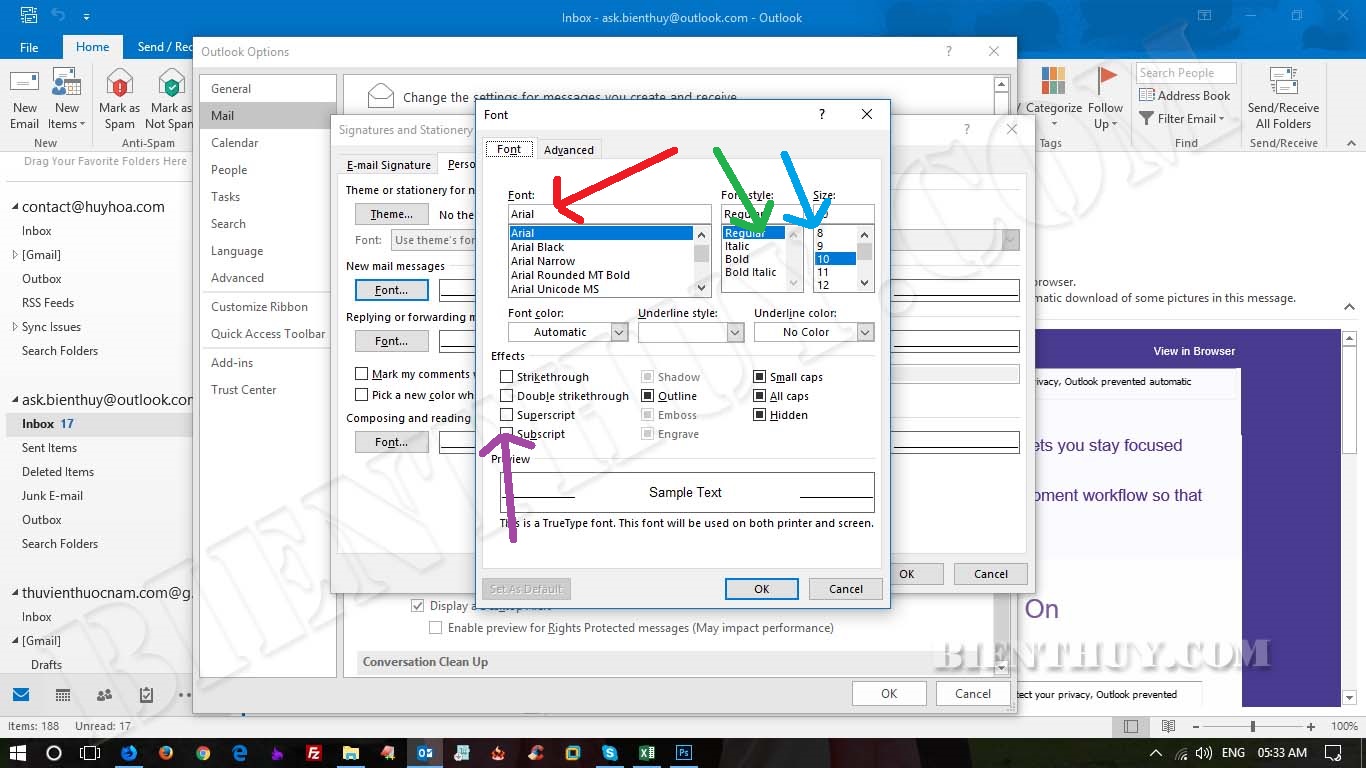
After completing the above steps, click OK to return.
Do the same for Replying or Forwarding messages and Composing and reading plain text messages
Continue with Replying or Forwarding messages and Composing and reading plain text messages.
Then click OK until all the opened dialog boxes are closed.
You can see that the steps to set the default font in Outlook are similar to creating a signature in Outlook.
Adjusting line spacing in Outlook emails
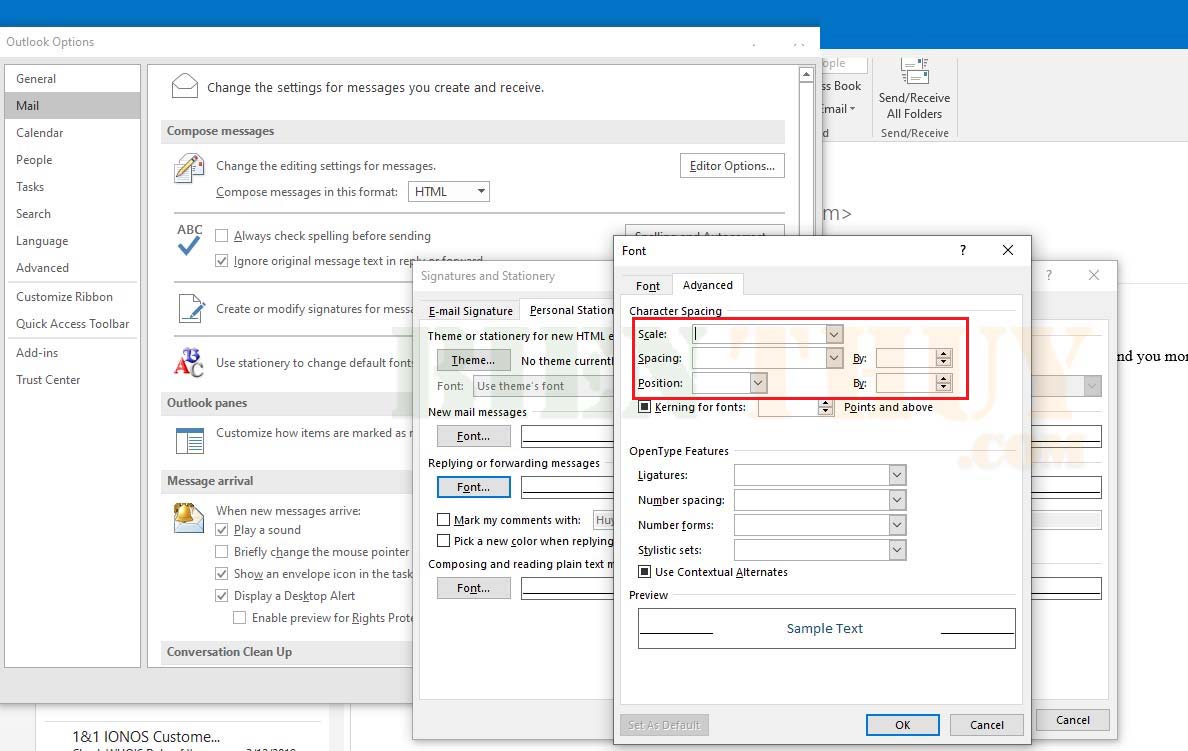
To adjust line spacing in Microsoft Outlook, you still refer to the dialog box as shown in Figure 5. Switch to the Advanced tab in Figure 5. You will see the items as in Figure 6 below. Adjust the line spacing within the red box, select each item, and adjust accordingly to increase, decrease, or set it to normal.
