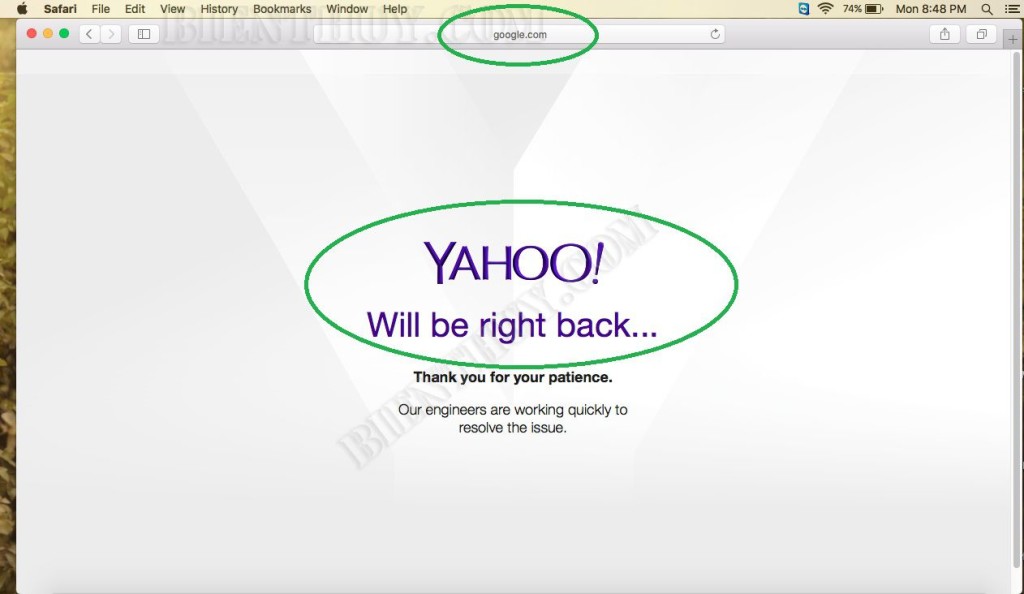
Sometime, you’d want to use the Hosts file instead of just letting DNS do its thing. For example, you are testing your sites before public it. Or you want to move site from old hosting to new hosting but dont want your site down. That’s why you can use the hosts file instead: Enter the server’s IP address or sub-domain and when you use that domain name, your Mac will go to that device instead. In this tutorial, i want to access google.com but it will show content from yahoo server instead of Google server. Let’s try edit host file MAC.
How to edit the Hosts file MAC
In this tutorial, i will use Terminal application found in your Mac’s Utilities folder to edit hosts file. The hosts file is locate at /etc/hosts on your MAC computer.
To open Terminal on your MAC, follow these step:
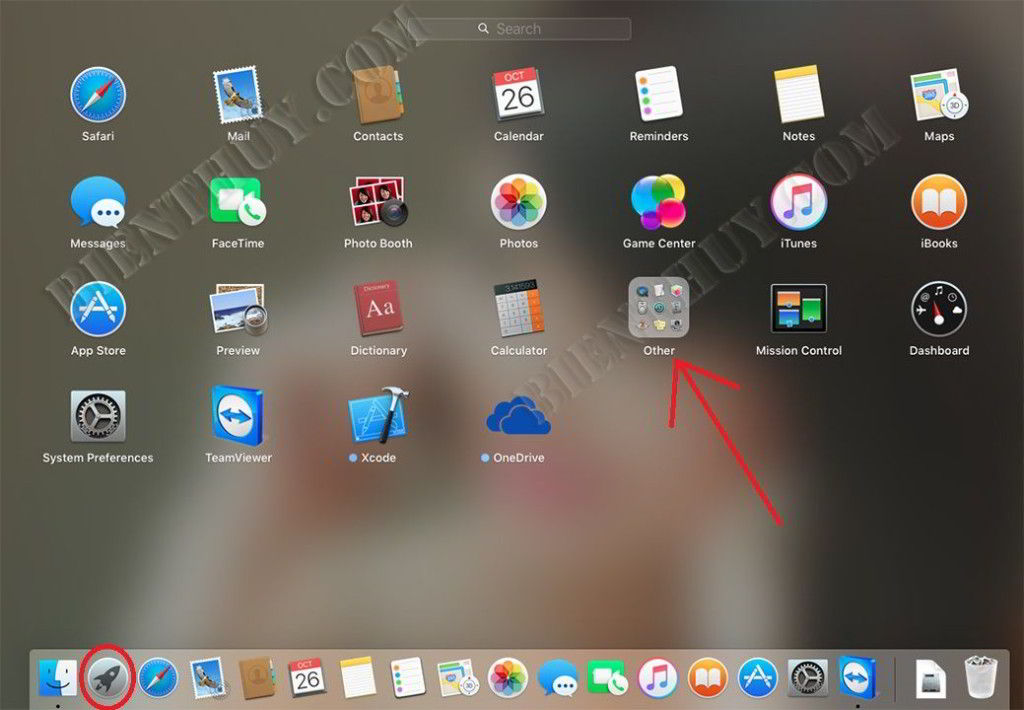
Step 1: Click on the Launchpad icon at the bottom bar on your MAC (red circle in below picture) and then click into Other:
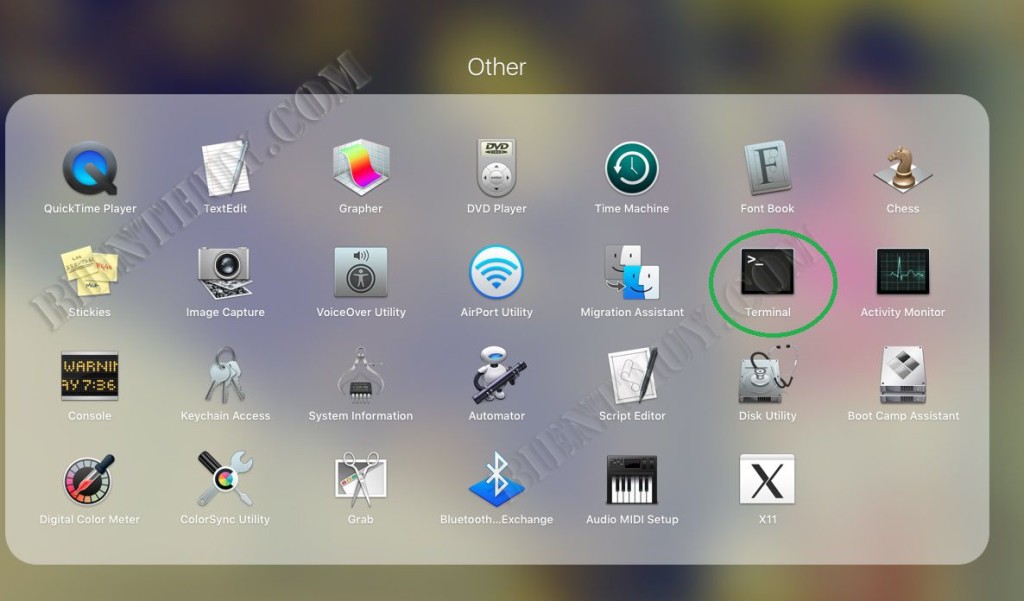
Step 2: On Other screen, click into Terminal icon:
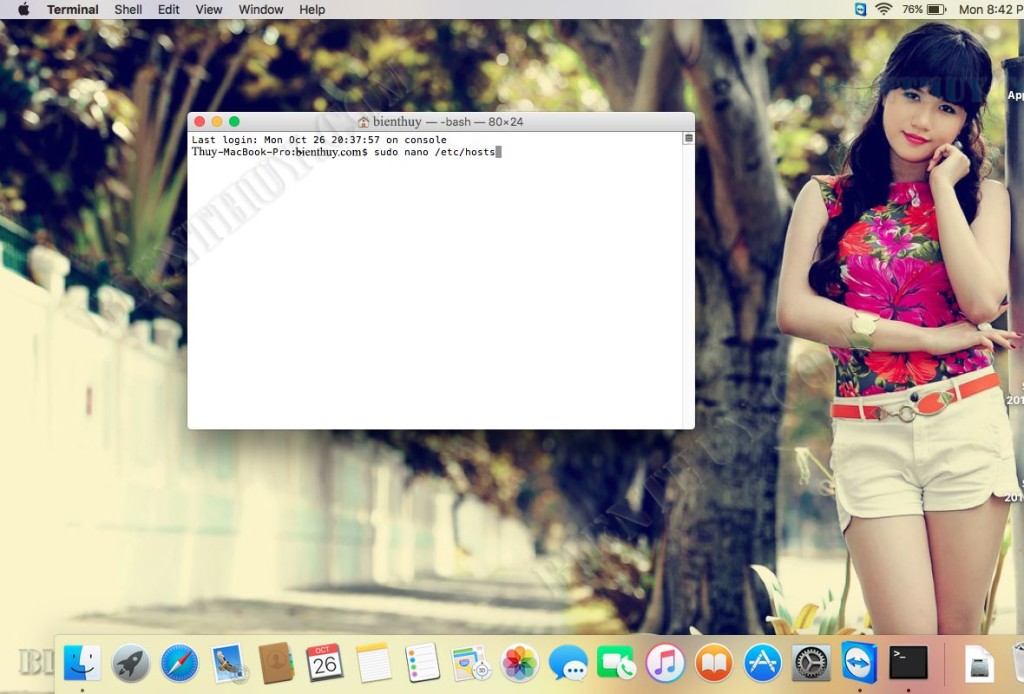
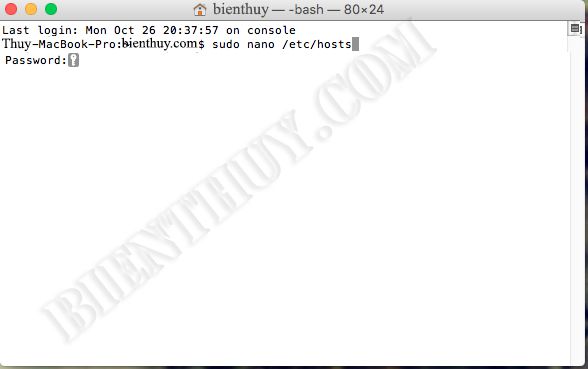
Step 3: Terminal Window will open, type: sudo nano /etc/hosts and then hit Enter (Return) on your keyboard. It will ask for permission, please enter your password and press Enter (return) to continue:
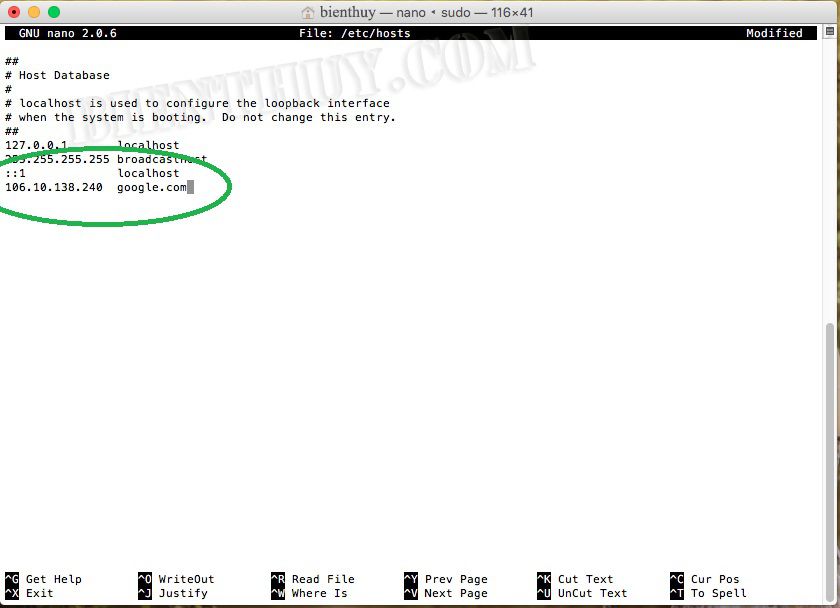
Step 4: Screen with /etc/hosts contents will show up. Move your mouse to the end of contents and enter your destination IP, and domain name you want to move as picture below (in green circle) – you can type the IP address, hit tab, then type the domain name. In this example, i will move google.com to 106.10.138.240, that’s a Yahoo server IP. Each move to one line. Press Enter (Return) to break line.
Step 5: After you’ve done, hold down the Control and O keys to save the file, then control and X to exit.
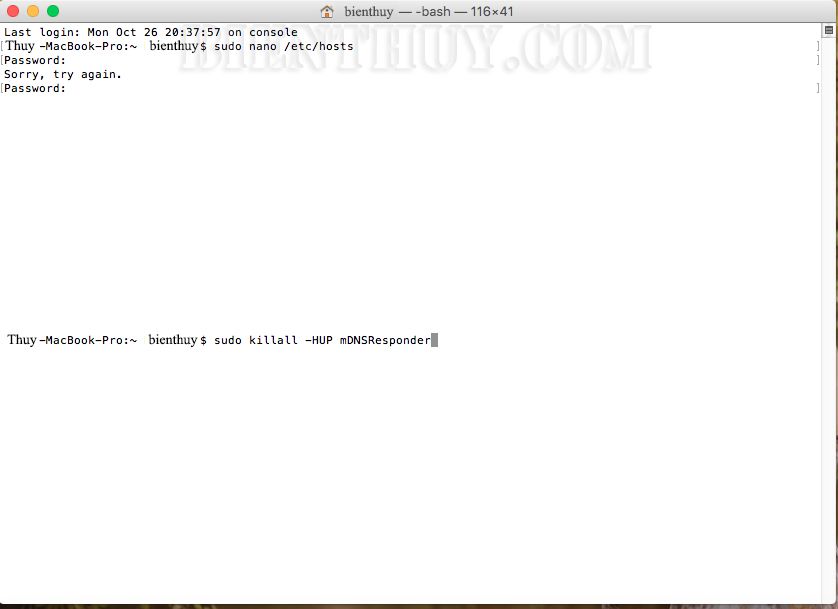
Step 6: It will back to Terminal screen. Type sudo killall -HUP mDNSResponder and then press Enter (Return). This command will flush your Mac’s DNS cache.
Step 7: Open Safari and then type your domain (in my case is Google.com) and then enter. You should see the contents of new IP server.
